1. Routing Preparation
The WAN port is the entrance, where you connect the Gigabit network cable of the optical modem (the optical modem can automatically obtain an IP address) or connect the optical modem to the router, and then connect the network cable to the WAN port of the small G device.
The LAN ports are outlets that connect to a multi-port Gigabit switch, which then splits into multiple Ethernet cables to connect to various groups of devices.
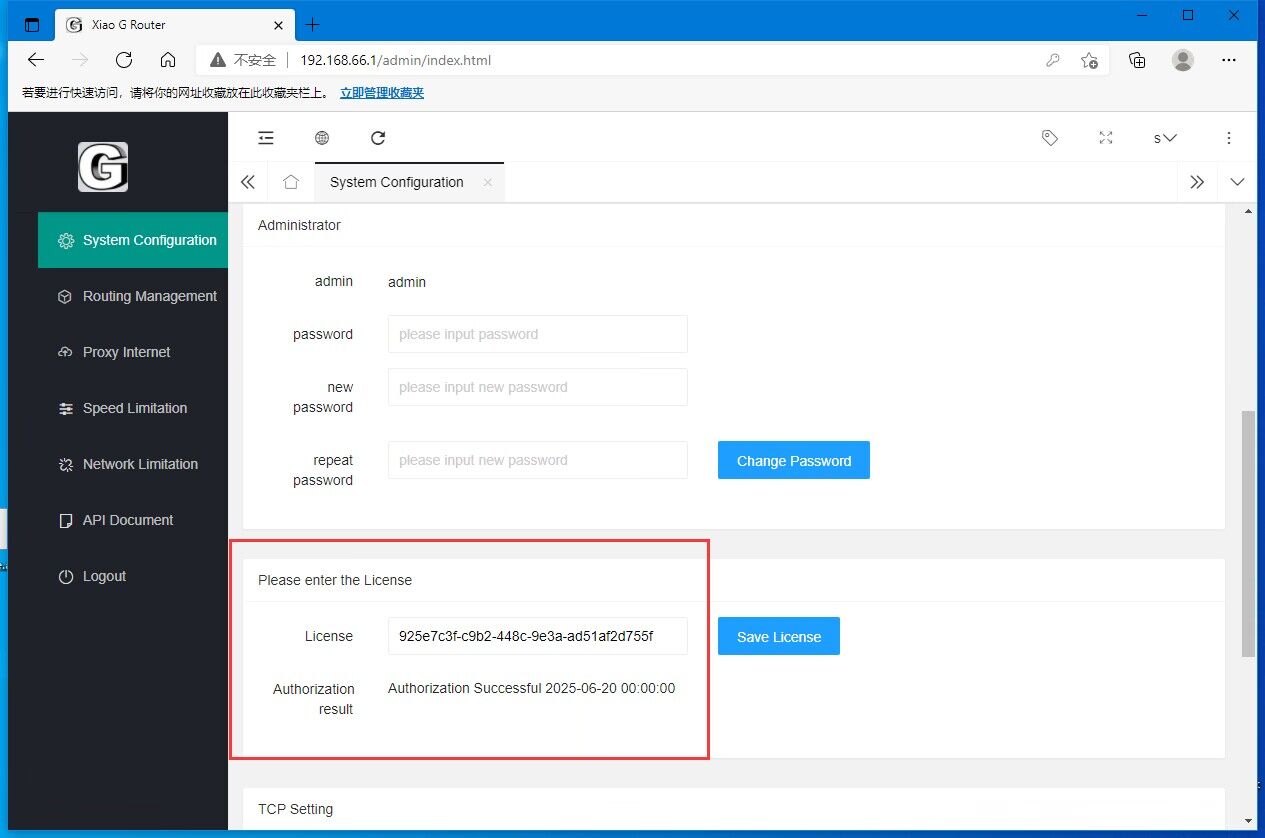
Log in to the backend of the XiaoG device and use the following address: 192.168.66.1
Management account: admin
Admin password: admin
2. Authorization code (scan the QR code on the router)
Get the authorization code and send it to customer service to get the activation time update
3. Router Management-Route Settings
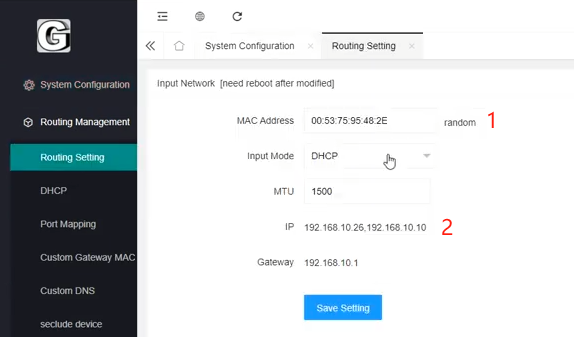
1 For ordinary small G router users, there is no need to worry about points 1 and 3, but if there are multiple small G routers under a single upper router, you need to click "Randomly Generate" and save the settings to avoid conflicts.
2 The two IPs listed here are the upper-level IPs, which allow access to the backend of the lower-level Small G router from the upper-level.
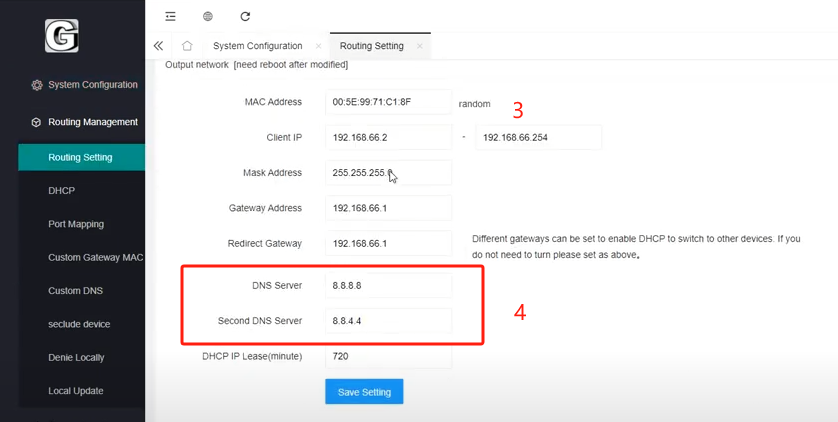
4 This section is for setting DNS. It takes effect globally by default. After modification, you need to restart the device to take effect. International users please change to 8.8.8.8 and 8.8.4.4.
4. Router Management - Custom DNS
The functionality here is the same as mentioned in point 4 above, but this allows you to set DNS for each device individually, taking precedence over the global setting in point 4. For example, if you have 20 devices and all of them require a Korean IP, you can set the global DNS to a Korean IP in point 4. However, if those 20 devices have different IP requirements, such as Korean, US, etc., you can set DNS for each device individually here. The settings will take effect after a reboot.
5. Router Management-Route Settings-Other Settings
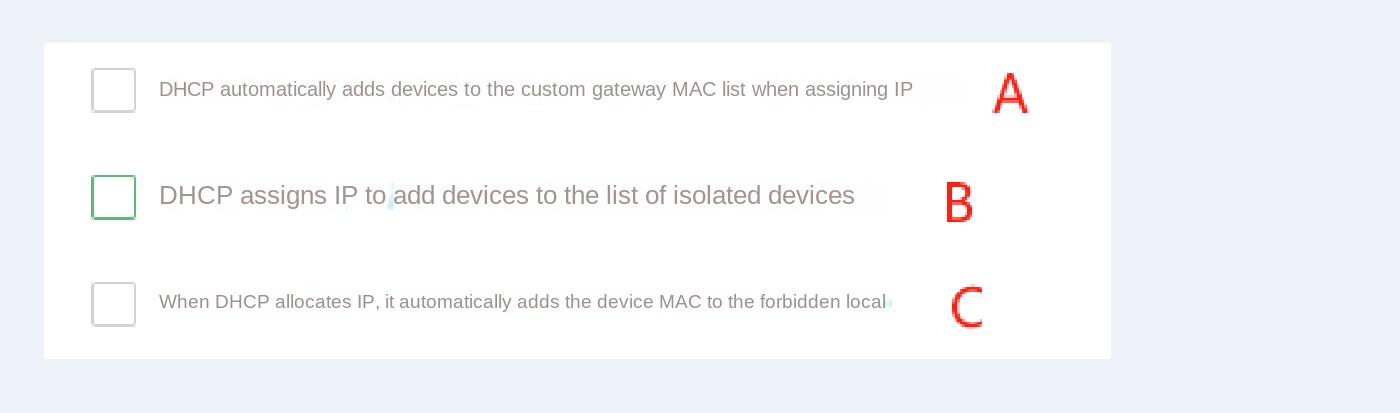
1 After checking, the newly connected device will be automatically added to the gateway's customized MAC list.
2 Once checked, newly connected devices will be automatically added to the quarantined device list.
3 After checking, newly connected devices will be automatically added to "Prohibit local routing" according to their MAC addresses.
For 1, 2, and 3, the "Auto-Add" feature only applies to newly connected devices newly acquired in DHCP. If this option was not previously selected, you can delete all devices in DHCP and restart the device to enable auto-add, or you can copy the MAC address of the device and add it manually.
Gateway Custom MAC - Typically, a router has one network interface card and therefore only one MAC address. The gateway MAC address remains the same for all devices passing through the router, regardless of how the IP is proxied. To implement a unique gateway MAC for each mobile device, this is similar to connecting each device to a separate router.
Isolate devices - If you want to enable screen mirroring from a computer, you need to remove that computer from the isolated devices list and add its MAC address to the whitelist to ensure normal screen mirroring functionality.
6. DHCP function
- Static allocation: It is recommended to set static allocation to avoid changes in the intranet IP.
- Edit: Allows modification of the device's internal network IP.
- Proxy: Allows you to select a proxy IP for the device.
- Exclude: Set the IP or domain to bypass the proxy IP tunnel.
- Pause: Temporarily disable the proxy IP for a device, allowing it to access the local network without restrictions.
VII. Proxy Settings - Proxy Internet Access
- Domestic IP bypass proxy: After checking this option, domestic IPs in China will not use foreign proxy IPs, reducing the number of connections and increasing speed. Foreign users do not need to check this option.
8. SOCKS5 Proxy
- SK5: Some configurations do not support UDP, so unless UDP support is required, E can be left unchecked.
- F: For special cases like Moonlight Sculptor, enable direct IP connection instead of domain name to access the game. In rare cases, packet capture analysis may be required.
IX. Short-term IP of the proxy
- A SOCKS5 short-term IP needs to be created first in SK5 by entering a unique number (eg 1) and clicking Add (including the password if applicable).
- Continue to use numbers like SK5001, SK5002, etc. to create other short-term IPs.
- Protocols such as PPTP, SSTP, L2TP, SSR, HTTPS, and Red Dragon will not be described in detail.
10. Batch Add
- SK5 example: IP:Port---Account---Password---Local IP---Remarks
- Example 1: 123.574.65.54:1111---abc---adb---192.168.66.36---
- Example 2: 123.574.65.54:1111---abc---adb------
- Example 3: 123.574.65.54:1111--- --- --- ---
- Example 4: 123.574.65.54:1111------------
- Empty fields can contain spaces or no input.
11. API Documentation
- For people with technical skills, API documentation provides greater flexibility and freedom of use.
12. Using the Small G Router with Local Network Disabled on the PC
- Close the browser.
- Use the command
ipconfig /flushdnsto clear the DNS cache. - Restart the computer.
- Go into your router's backend settings, disable local networking and configure a proxy. Keep your browser open to avoid long loading times (for unknown reasons, affects fewer PC users than mobile users).
13. SK5 is not compatible in some areas
- In some areas, SK5 may not be available due to ISP restrictions. Applying for a public IP from your ISP or using the XG protocol (developed by us) can solve this problem.
14. Limitations of SS and SSR
- The decryption process of SS and SSR is very resource intensive and exceeds the capabilities of the Small G Box, so it should not be overused.
15. Batch notes for easy management
- Support adding batch notes to facilitate device management.
XVI. DHCP Exclusion List
- Refers to the IP or domain name that bypasses the proxy settings. Please test if necessary.
XVII. Local Network Disablement Exclusions
- Refer to the exclusion list in the Local Network Disablement settings. Test if necessary.