1. Download the flashing tool and Samsung phone driver (just unzip the flashing tool, the driver file needs to be installed)
Flashing tool: English version: https://drive.google.com/file/d/1XQ3bTMFjZ5BQs6JUw1ebJoJZH9FujsuB/view?usp=sharing
Chinese version https://drive.google.com/file/d/1GqGgkhw8jQr7nmOjyHKqGMkGYeAjNNrM/view?usp=sharing
Samsung phone driver: https://drive.google.com/file/d/13Ttzf66z7Uu1K3kx7QeDZFSWvcfHtSm2/view?usp=sharing
2. Download the system for the corresponding mobile phone model
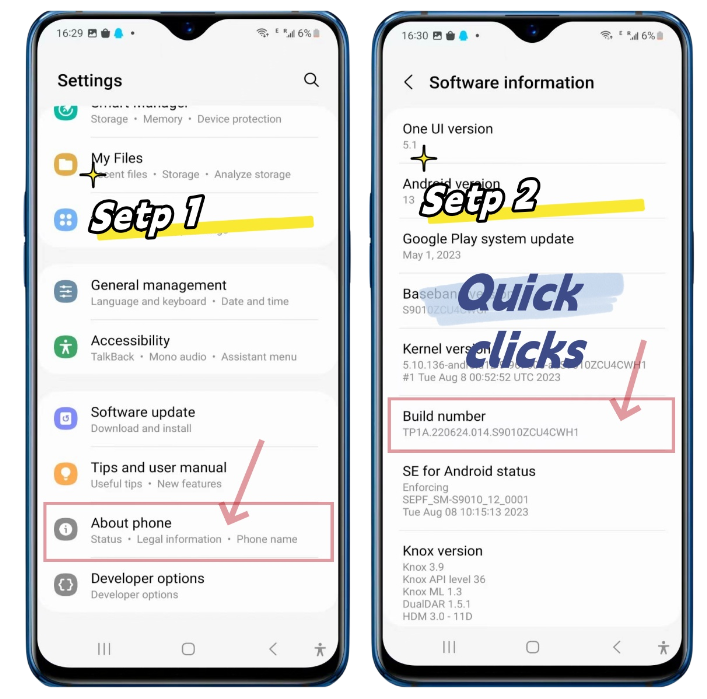
First, open the phone's settings - about the phone - software information to check the phone model and system version
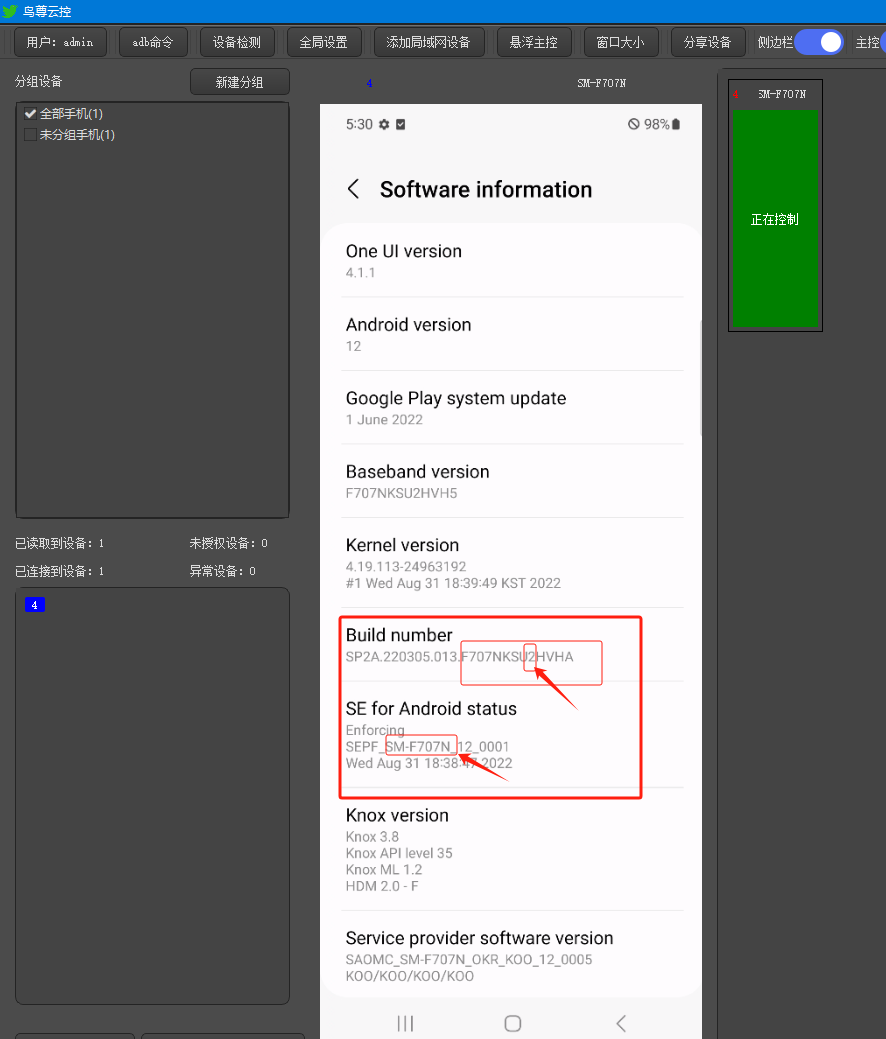
Check the BIT/BINARY value through the Build number , which is located in the last six digits of the number.
Check the SM version through the Service Provider Software . The general format is SM-G****SM-F**** . The emphasis is on the last digit. For example, U and U1 represent the American version, B and F represent the European version, N represents the Korean version, and 0 , 8 and 9 represent the Chinese version.
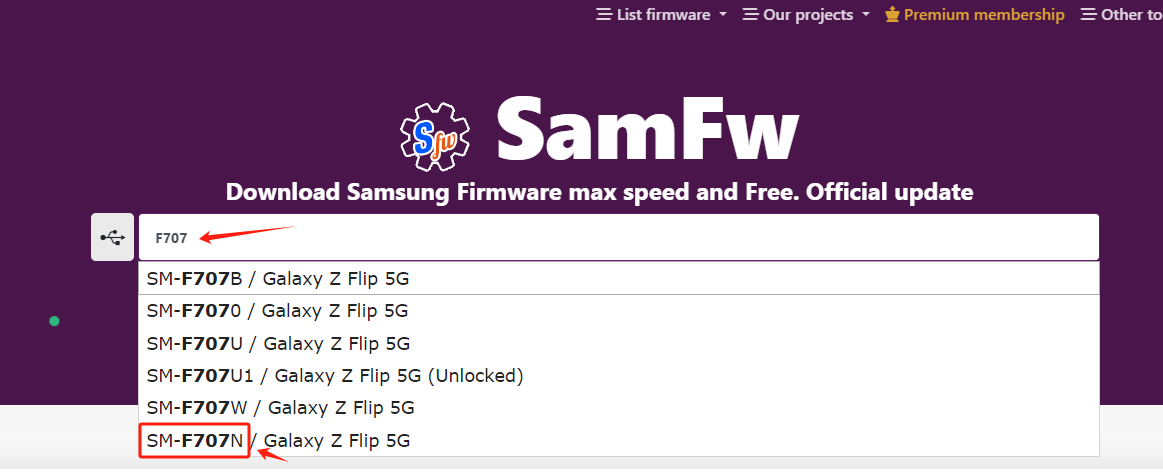
Then open the rom download website:https://samfw.com
Select by searching the SM version number.
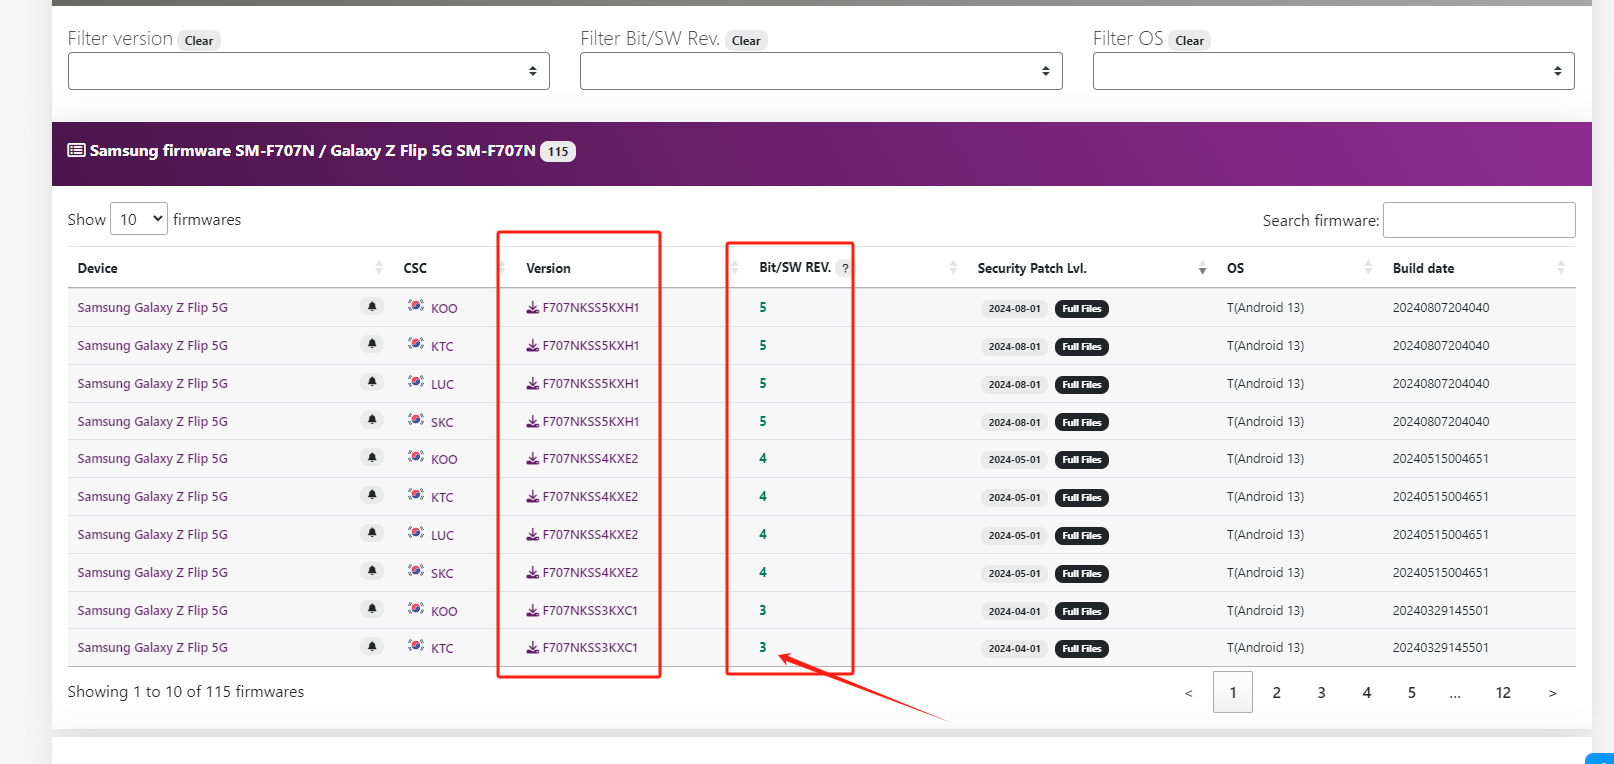
Open the searched version and find the BIT/BINARY value. Samsung system supports upgrading to a higher BIT version or downgrading to the same IT version, but does not support downgrading to a version lower than the current BIT .
So if our BIT version is 2 , as long as you download a version with BIT 2 or above, you can flash it. If you download a version with BIT 1 , the flashing will fail. According to this logic, you can choose the Android version supported by BIT for upgrading and downgrading
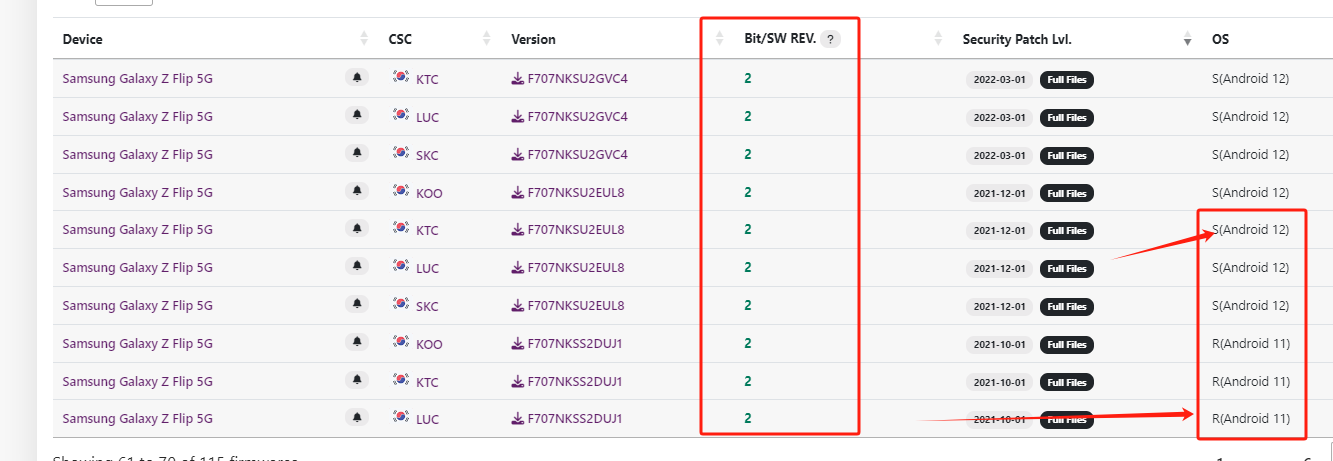
As shown in the picture, we can currently upgrade to Android 13 or downgrade to Android 11 , or flash the same level to Android 12
Download according to your choice
3. Use the adb command of the control software to put the phone into flash mode
We enter the flash mode through the simplest command method, open the control software adb command window, enter adb reboot download to run
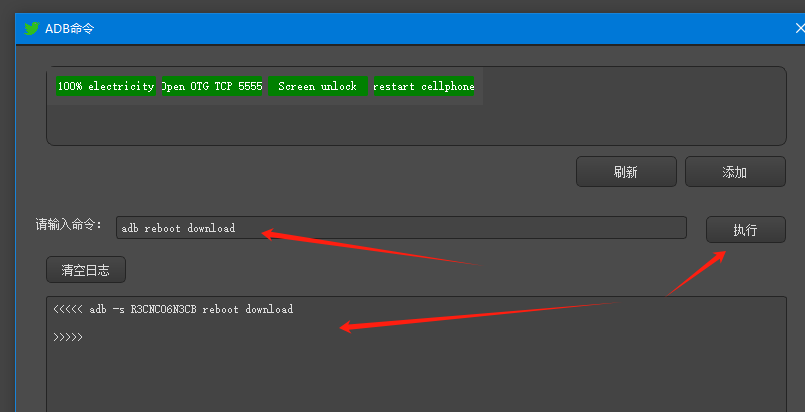
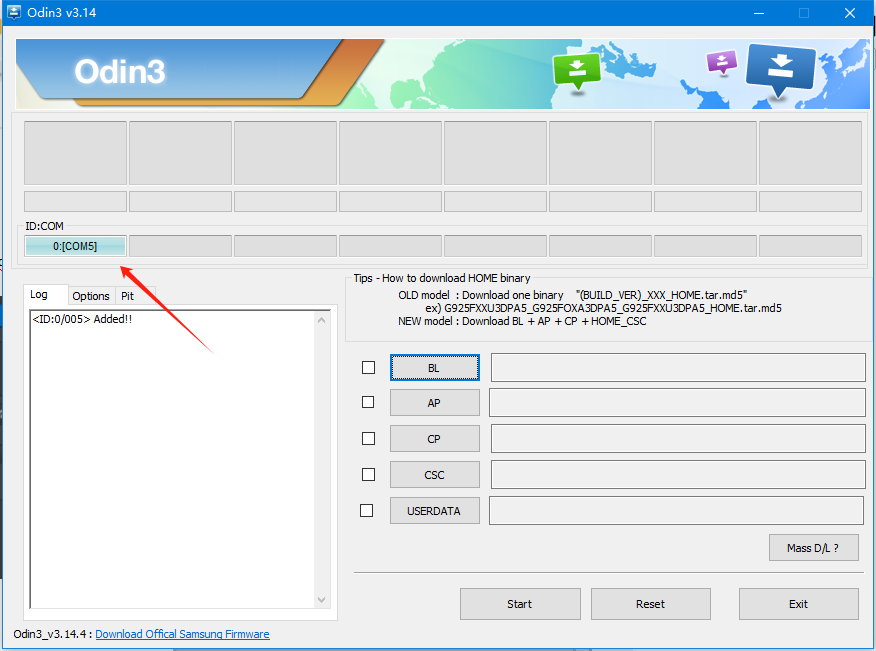
The phone will then disappear and enter the flashing mode. Through the Odin3 tool, you can see that the phone has entered the flashing queue.
4. Unzip the rom file and use the flash tool to select the corresponding file
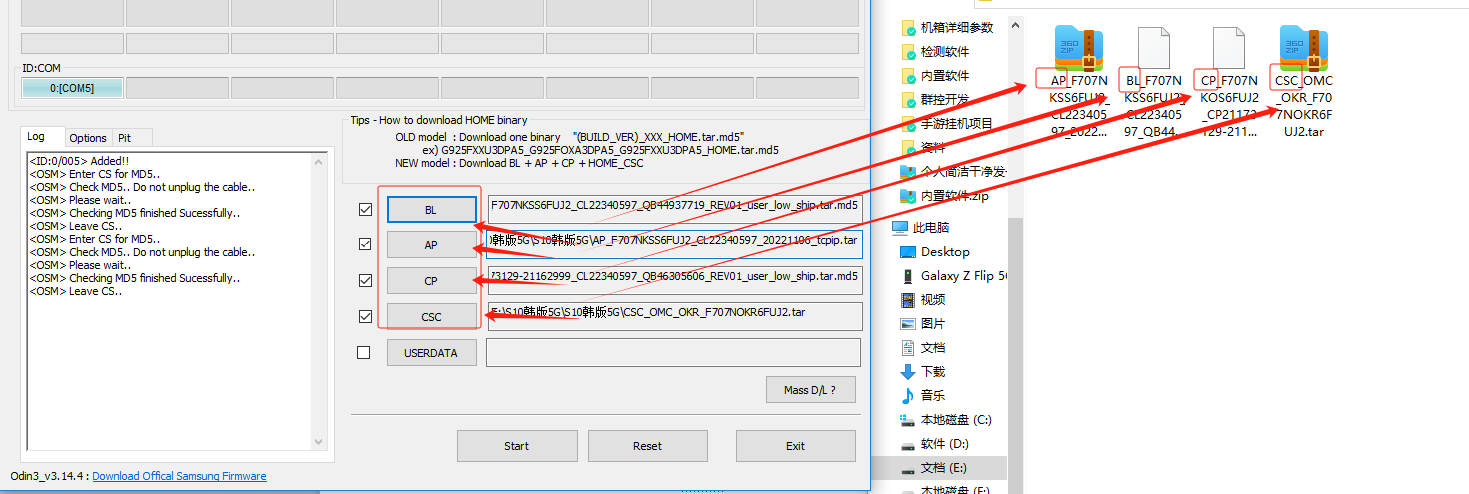
Select the corresponding file according to the first letter of the file
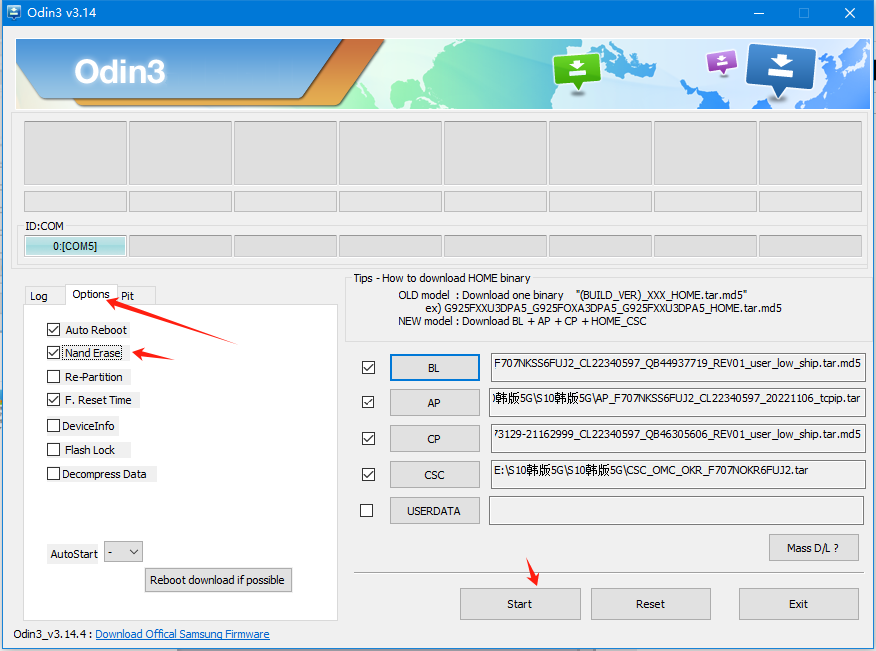
Then select the second option, check the second position, and click Start Flashing.
Checking the second position will clear the original data of the phone, making it cleaner
Do not turn off the power during flashing, and wait for the phone to automatically turn on after the flashing is completed.
For farm machines without screens, you can use the computer driver to identify whether the phone is turned on, and then proceed to the next step after it is turned on.
5. Connect the motherboard to the screen and turn on the computer
The connection positions of the motherboard and the screen are different for different models. If you are not sure where it is, please contact niaozun mall customer service for consultation. Connect the screen and then power on the computer. Inserting the screen with power on will not start the computer.
6. After booting up, turn on developer mode, USB debugging, and connect to the computer
After the phone is waiting to start up, complete the boot page of the first boot system and complete the connection between adb and the computer according to the following figure
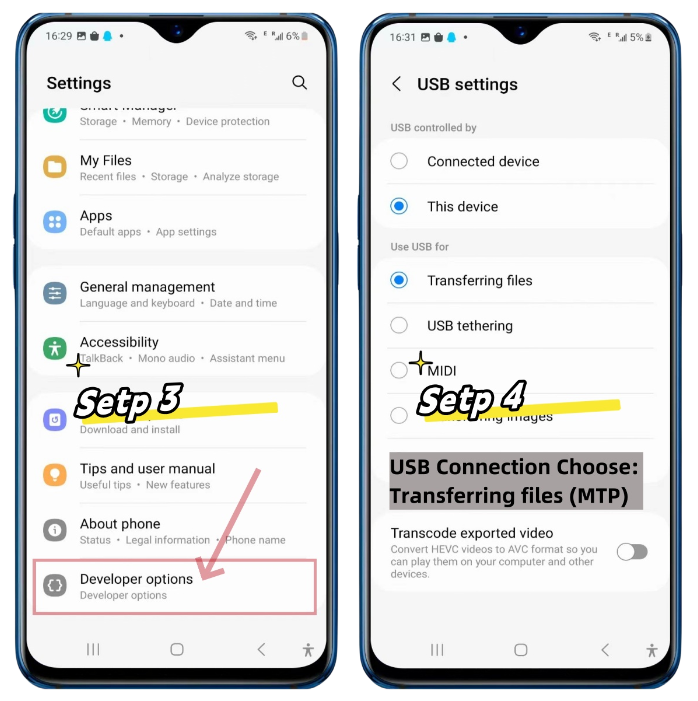
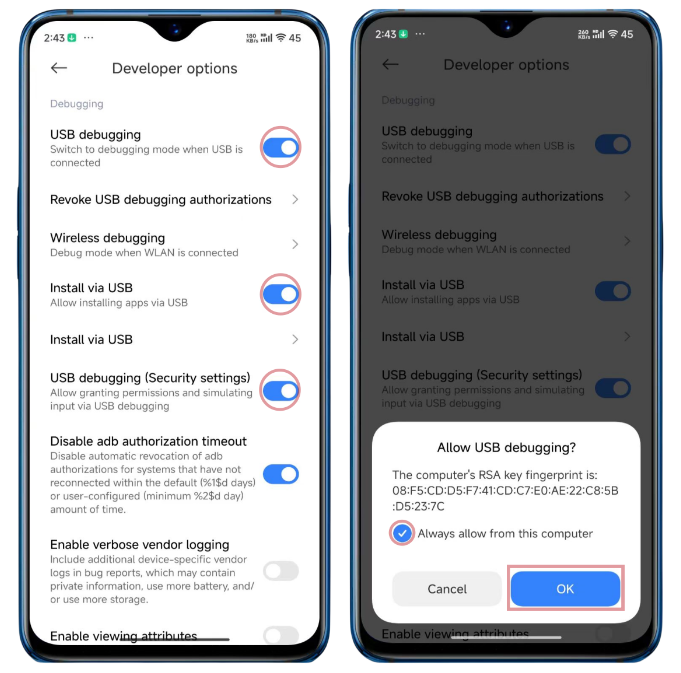
After completing the operation in the picture, you can see the phone through the computer mirroring software
Please note that in the developer mode of Android 12 and above, you need to check the option to disable adb authorization timeout, otherwise you will need to re-authorize the connection to the computer after 7 days.
After that, just restore the connection between the mainboard and the farm box.
All work is completed here. If you encounter any problems, you can contact niaozun mall customer service for consultation.